A Guide to Reducing the Cost of Your Custom Graphic Overlays
Collaborate with a Knowledgeable Partner
Cost-effective overlays don’t come from cutting corners—they come from smart design and expert collaboration. When you work with an experienced manufacturer like Label-Aid Systems, we bring five decades of expertise to every project. By working closely with your engineering and purchasing teams, we can often identify savings opportunities you may not have considered.
What Are Graphic Overlays?
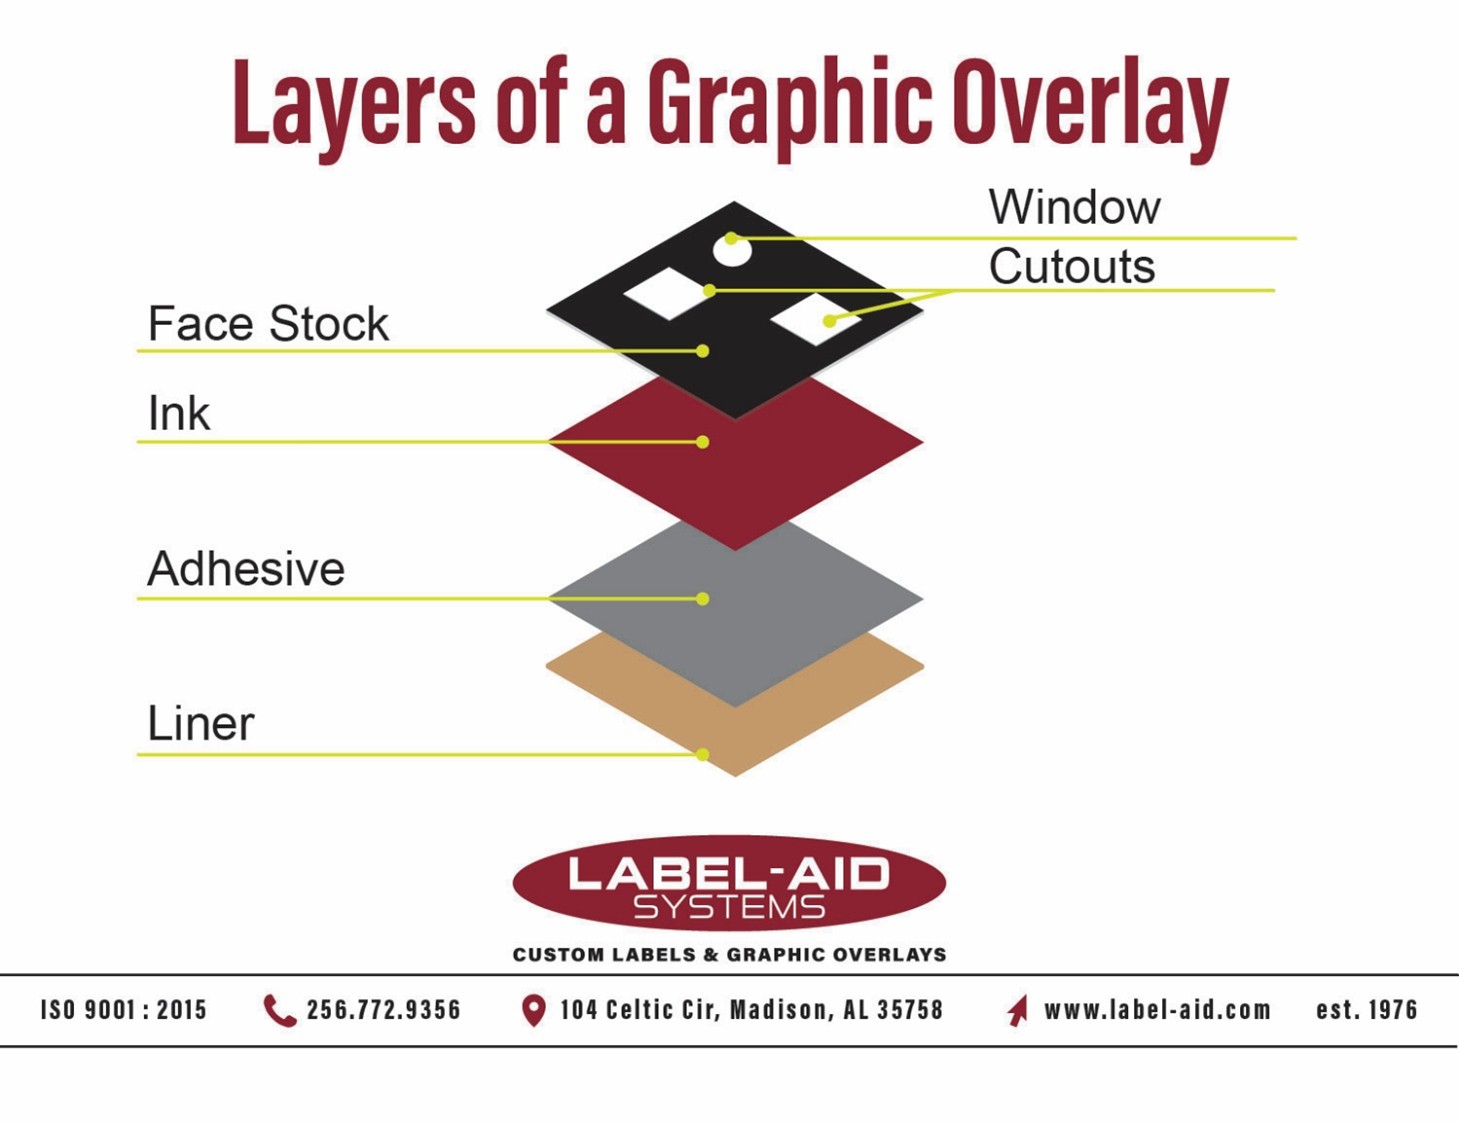
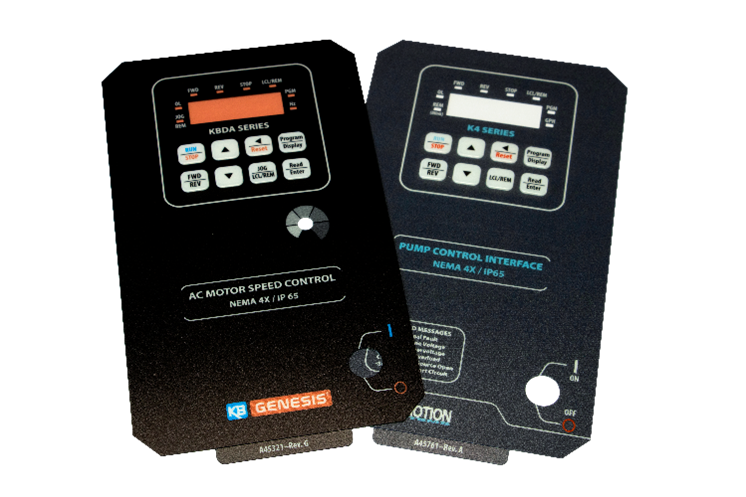
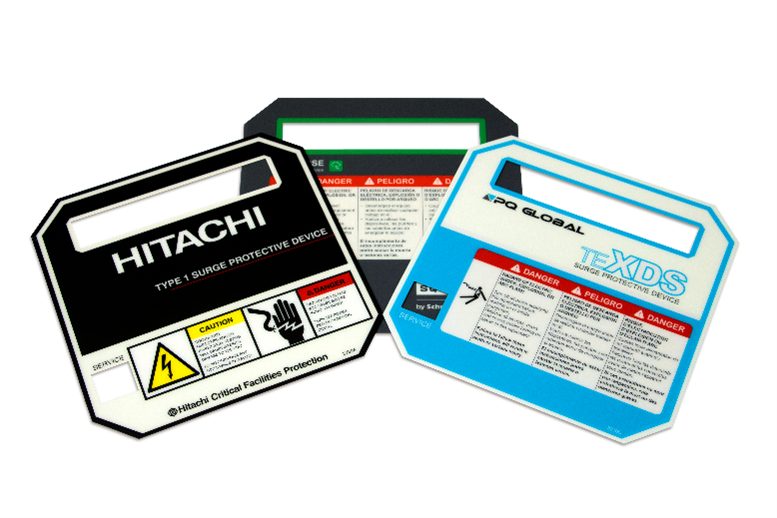
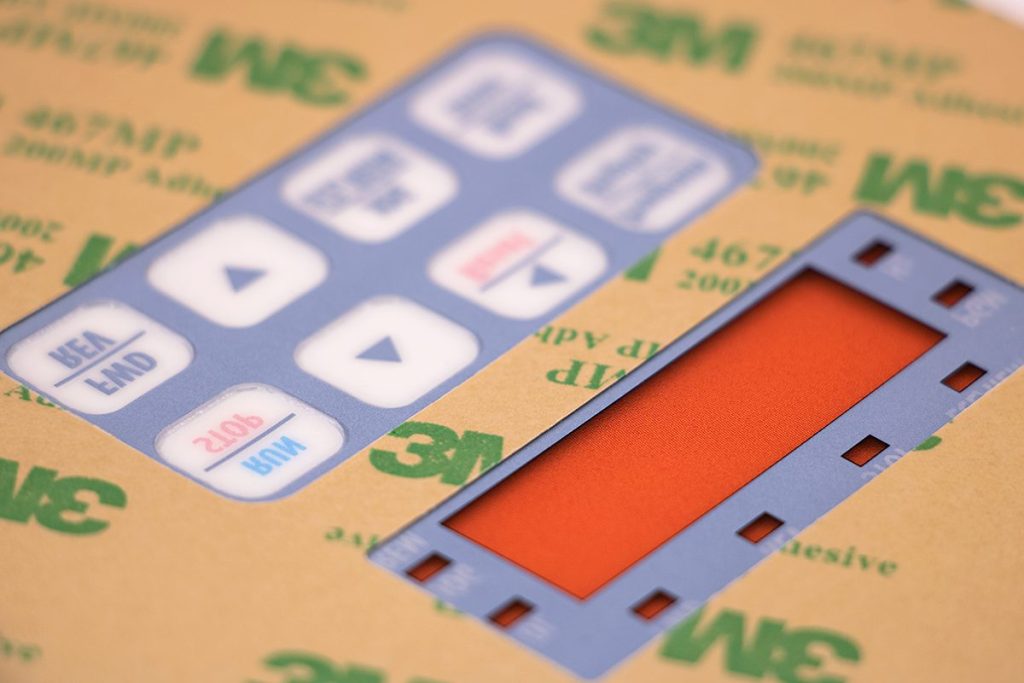
Graphic overlays—also known as operator interface panels, nameplates, or control panel covers—are the top layer of a user interface. They’re typically printed on the backside of a clear material like polyester or polycarbonate, and feature functional elements such as:
Symbols and text
Cutouts for switches or displays
Tactile feedback buttons
LED or LCD display windows
Branding or decorative elements
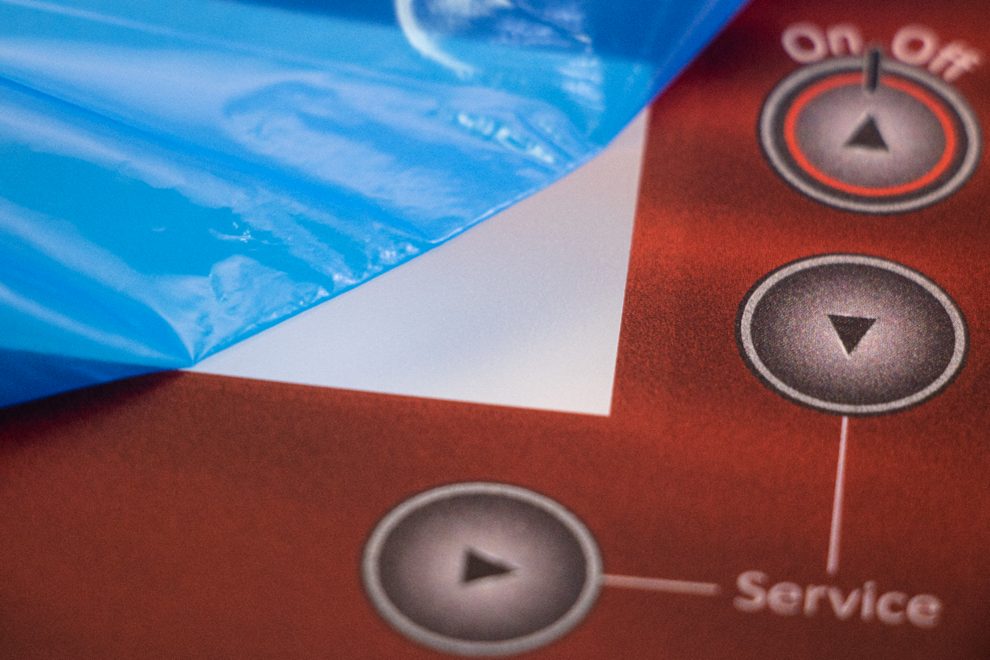
They serve both an aesthetic and protective function, shielding the underlying circuitry or equipment while guiding users. A graphic overlay provides the ultimate durability and many years of product life because second surface printing is utilized. Clear material is used, and the ink is printed on the backside of the material so that the graphics are seen looking through the front side or top of the material (reverse printing). Since there is no ink on the surface, the entire thickness of the material protects the graphics. The ink is encapsulated between the material and the adhesive for the ultimate durability and long life.
Why Cost Control Matters
Graphic overlays are customized for each application. There are many options available, some more expensive than others. That’s why it matters so much! We pride ourselves on delivering the correct solution, without overbuilding your graphic overlay and adding costs. View the following cost elements when you are looking to save dollars on your custom graphic overlays and allow us to put our experience to work for you:
Reduce Complexity in the Initial Design Phase
Choose the Right Material for the Application
Consult With Us Regarding the Two Printing Methods Available
Select an Adhesive That Bonds Well to the Particular Surface to be Labeled
Maximize Quantities Because That Drives Unit Costs
Options for Die Cutting
Reduce Complexity and Size in the Initial Design Phase
When designing overlays, especially for high-volume or cost-sensitive markets, it’s crucial to identify savings opportunities early in the design process.
Size
It sounds simple, but when designing a graphic overlay, think first about size as a cost savings option. Larger overlays cost more than smaller ones. Is there wasted space in your design that can be eliminated? Can you communicate everything you want to, with a pleasing design, and reduce the size of the graphic overlay? This small detail can add to large savings.
Eliminate Added Enhancements Options If Possible
Does your graphic overlay have to be embossed? That adds cost!
Have you chosen to add a selective texturing, surface finish, or other treatment to the front of your graphic overlay? Could that be eliminated? That adds cost!
Dead front graphics add cost. Are they necessary?
Spacers allow more room for switches and buttons. Can they be designed out? That saves dollars as well.
Corner Radius of Squares and Rectangles, Size of Holes
Round-cornered squares and rectangles are easier to manufacture, and the tooling costs less. Is that acceptable for your design?
For holes, we like to see a minimum diameter of .0625” for materials that are 10 mils and thinner, and .125” for 15 and 20 mil materials for circular cutouts or punches with at least .25” clearance on at least one side. Is that feasible within your design parameters?
Can Multiple Graphic Overlays Use the Same Tooling?
Saves on tooling cost
Saves on unit cost because you have more units to cut without a changeover
If you are uncertain about your design, we offer low-cost prototypes with no tooling charges!
Chose the Right Material for the Application
More than 80% of the applications we manufacture for our customers use 10 mil polycarbonates. The other applications would be thicker or thinner polycarbonates and polyesters in various thicknesses. The fact that most customers choose polycarbonate speaks to its ability to handle a wide range of applications and operate effectively as the go-to material. Polycarbonate saves dollars!
Many textures are available, including those that enhance and provide better abrasion resistance.
Polycarbonate covers a broad range of applications and is specified most often by end users and their engineering departments.
Its clarity is excellent, even in greater thicknesses, superb clarity for brilliant colors
Provides better embossing details
Can be flame retardant
Can add a hard coating to enhance durability
Things to Keep in Mind:
Flex Life is limited to 150,000 to 200,000 actuations for the life of the product
Not as resistant to chemicals, solvents & acid
If your custom graphic overlay will be in an indoor environment, requires a flex life of under 150,000-200,000 actuations, and will undergo regular cleaning without harsh solvents or chemicals, then the economical choice for material is polycarbonate.
The flex life when activating a switch is much greater, with 1,000,000 to 10,000,000 actuations possible for the life of the product without cracking.
Much greater chemical, solvent, and acid resistance. Best choice in a harsh environment where many cleanings take place repeatedly, or exposure to chemicals
Better scratch and abrasion resistance
Generally, the toughest and most durable material and available with an additional hard coating for even more durability and scratch resistance. It is simply more resilient.
The choice for outdoor applications (except salt water exposure)
Things to Keep in Mind:
Limited thicknesses to .005”, .007”, .010” for indoor applications and .006”, and .008” for outdoor applications
Not flame retardant
Limited textures available
Clarity is not as good as polycarbonate, but is still very good. Clarity refers to how the subsurface inks appear when viewing the overlay from the front through the material.
More costly than polycarbonate
Other Material Considerations:
Texture
Most of our customers choose a velvet texture on the front of the material to be exposed to whatever elements may exist. Velvet, which is coarser than other finishes, hides fingerprints and scratches better than alternate gloss finishes. Other finishes available are gloss and matte. A gloss finish appears like glass and looks great when new, but will scratch much more easily. We only recommend a gloss finish if the graphic overlay is informational only, not functional, and will not be cleaned or used often.
The process begins with a mesh screen, which is tensioned on a square roller frame. This mesh is porous.
The mesh or screen is coated with an emulsion gel, and the emulsion hardens when exposed to intense light.
Before exposure to the light source, a film of the image to be printed is placed over the screen. The image will be dark in order to block the light. All parts of the emulsion harden except for the image, which was blocked from the light. The image portion blocked from the
light remains a gel, and the emulsion gel is then washed out, to expose the mesh underneath it. This is referred to as a stencil.
Thick ink is pressed through the mesh screen only, with a squeegee, where the emulsion was washed out to create the desired image. For each different color, a screen with the various images must be prepared and properly registered with the color or colors that have been printed previously.
The graphic overlay, decal, or label is processed through a UV dryer, one color at a time, until the image and all its colors have been completed.
Advantages of Screen Printing
Thick ink film thickness creates the ultimate for outdoor exposure to the elements. This is the best fade-resistant process.
Durable
Metallic inks can be used.
A wide variety of substrates are available.
Disadvantages of Screen Printing
Slow process
Set up time for each screen (color)
The more colors that are required, the higher the cost, because of the requirement of a screen for each color
Digital graphic overlay printing is a process that does not use plates. Artwork, via an electronic file, is converted to dots, and four colors (CMYK) are used to create any possible color. Images are transferred onto the substrate directly from the artwork via a blanket. The art image is transferred to the substrate as a unit, perfectly registered. Many call this process art to print, and that aptly describes digital printing.
Advantages of Digital Printing
Because the art image is transferred to the substrate as a unit (all colors or dots), registration is perfect from overlay one until the end of the run. No bleeds or traps are necessary!
Also, because colors do not need to be brought into registration, scrap is extremely low, which lowers cost.
Because each label is reimaged before it is transferred to the substrate, total customization for each and every label is possible.
No charges for art, plates, or film.
Very little to no setup
Total flexibility for graphic designers
Unlimited copy changes, as every label can have variation
Unlimited colors
Easily prints complex graphics.
Stunning appearance
Serialization or variation of each label including numbers, bar codes, QR codes, images, text
Fine gradients and vignettes, without dot drop off experienced with other printing process (no harsh lines)
Consistency of color throughout the run and from run to run
Lower minimum quantities, at lower costs
Future revisions of current labels without incurring additional costs
Faster from initial order to print, since there are fewer steps
Can print much smaller images and fonts with clarity
Lower costs
Disadvantages of Digital Printing
Unable to reproduce metallic inks well
Not well suited for outdoor graphic overlays if heavy UV exposure occurs
Select an Adhesive That Bonds Well to the Particular Surface to be Labeled
Avoid over-specifying adhesives!
On smooth surfaces, a 2-mil adhesive will work great, so why pay more for a 5-mil adhesive or an LSE (low surface energy adhesive)?
Things we need to know to make sure we are using the correct adhesive for your application:
What is the surface texture the graphic overlay is to be applied to?
Is the surface flat or curved?
Will any contamination be present on the surface that the graphic overlay will be applied to? (Oil, grease, release chemicals, particles, fibers, dust, etc.…)
Any plasticizers on the surface?
Application temperature?
Is the surface energy of where the graphic overlay is applied high or low (see below)?
Adhesives will be more attracted to high surface energy than to low surface energy. We use adhesives that can stick to both well, but adhesives for low surface energy are more expensive, so this must be known.
Higher Surface Energy (Better Adhesion)
Metals
Kapton
Polyurethane paint
ABS
Polycarbonate
PVC
Polane paint
Epoxy paint
Noryl resin
Phenolic
Acrylic
Polyester
Nylon
Lower Surface Energy (Possibly Poorer Adhesion)
Powder-coated paints
Teflon
PVF
EVA
Polystyrene
Polyvinyl Acetate
Acetal
Polypropylene
Polyethylene
Metal mesh
Wood
Rubber
Foam
Maximize Quantities Because That Drives Unit Costs
Can you order a larger quantity and inventory at your location? This will yield a lower unit cost.
Can you issue a blanket P.O. for a larger quantity for us to inventory at our location? We charge a modest cost to run this program, and you get the benefit of lower unit costs and are billed when your graphic overlays ship.
In the design phase can you use the same tool for multiple items, where a single run has the advantage of more units? This saves money as well.
Options for Die Cutting
We are great at determining which die cutting method offers the lowest possible applied cost. To determine the best return for your dollars spent, we need the quantity desired per time period (month, quarter, year). With that knowledge, we can determine which method makes sense.
Steel Rule Die Cut
Sharp, thin, steel blades are bent into the desired shape to cut the custom graphic overlay and embedded in a die board. Ejection rubber is placed within the die to help push or eject the graphic overlays out of the die.
Major advantage is speed.
The larger the order, the better this option lowers your cost.
We charge our customers only the cost of a steel rule die, and it is a one-time nonrecurring cost.
Laser Die Cut
A high-powered laser beam is guided by software to precisely cut out the shape and various cutouts of your custom graphic overlay. There is no one-time charge.
Slower, but can be a cost savings for small runs, or one-and-done graphic overlays
Great for prototypes and small runs
Great for very complex shapes and intricate cuts
Cost-saving tip:
Ask us if your design can fit within existing tooling dimensions. At Label-Aid, we have hundreds of standard die templates that may match your needs, reducing or eliminating custom tool costs.
Final Thoughts: The ROI of Smart Overlay Design
Reducing the cost of graphic overlays doesn’t mean sacrificing performance, brand identity, or durability. It means working smarter—designing with purpose, selecting materials wisely, and leveraging the experience of a trusted manufacturing partner.
At Label-Aid Systems Inc., we’ve helped customers in every industry—medical, industrial, electronics, aerospace, and beyond—strike the perfect balance between quality and cost.
If you’re in the planning, design, or procurement stage of a new product, we invite you to contact our team today. Let’s create high-quality, budget-friendly overlays that help your product shine—and your bottom line thrive.